KSUN ZL10 Zello Handie Talkie Modifications
KSUN ZL10 Zello Handie Talkie Modifications
Article by KM4OVZ
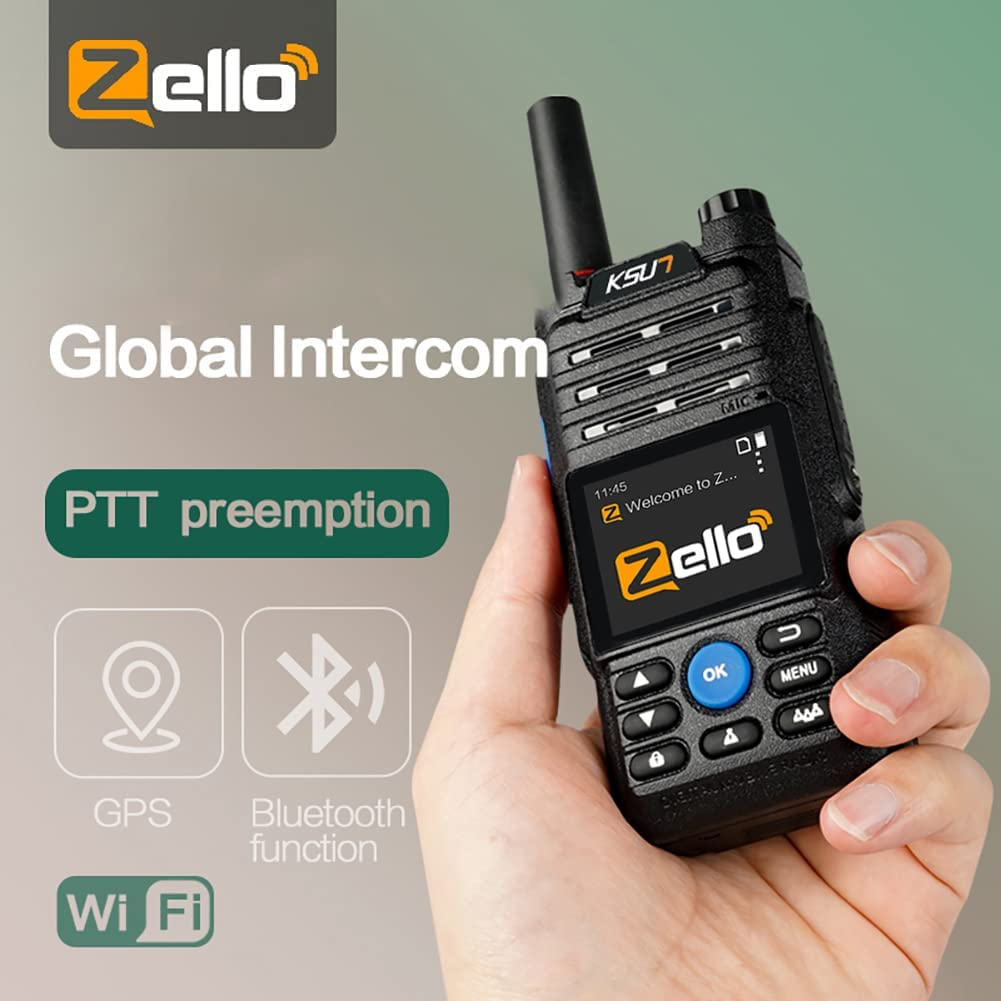
In this article we will be hacking and improving the cheap Zello walkie talkies that you can get online for around $60. These radios are essentially a low power android phone (running a Quallcomm 8909 aka Snapdragon 210). The OS has been stripped down to the bare essentials for running Zello and doing basic WiFi and cellular configurations.
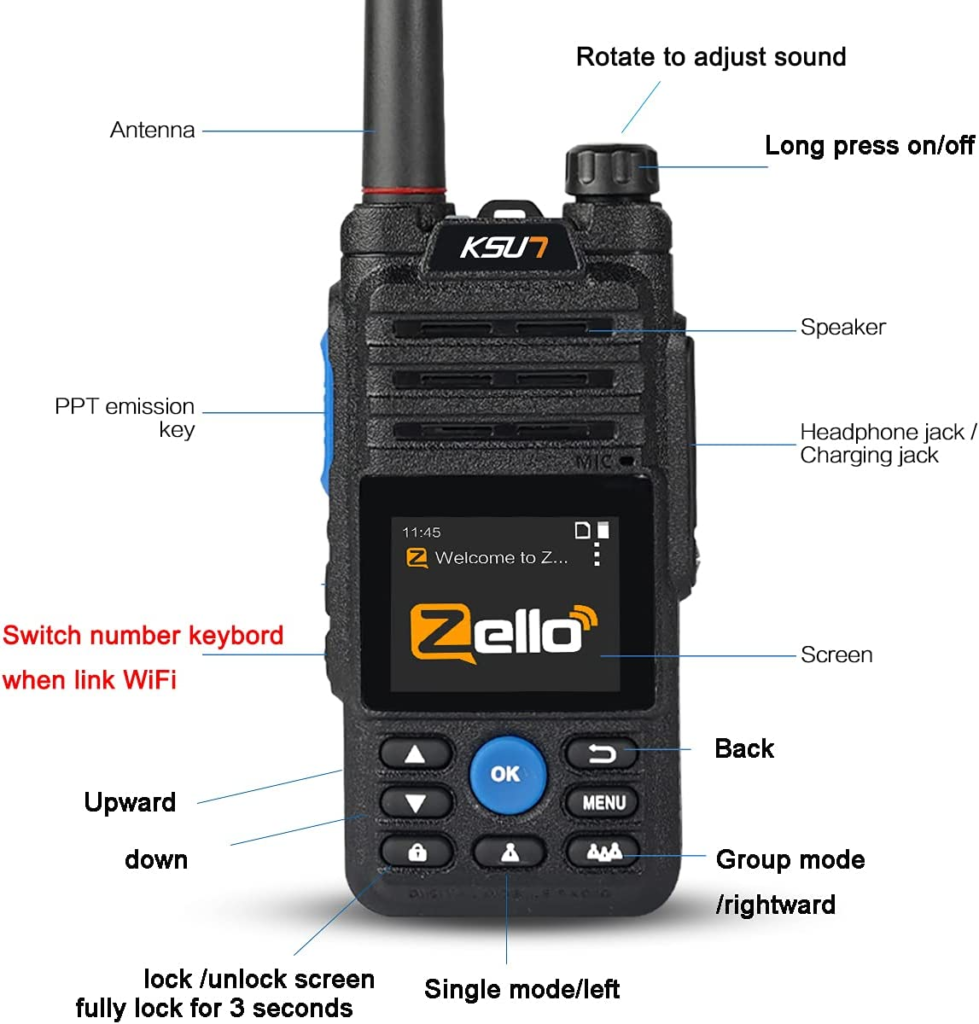
Hacking this devices is not really a true “hack” but just knowing which available tools will interface with these radios and give you the power to change things within the OS. We will be able to upload our own sound effects to Zello, change the screen resolution for much improved Zello interface usage and adjust things like screen timeout time.
To get started, we need to get the Android Debug Bridge (adb) running on our computer. On linux it’s as easy as running ‘sudo apt install adb’. For Windows users, this guide has all the info you need:
https://www.xda-developers.com/install-adb-windows-macos-linux/
Once it’s installed/running, you need to plug in the radio. The provided USB cable is POWER ONLY, so you’ll need to source a cable that does data as well. When you plug it into a windows computer it will say “setting up ANDROID”. On Linux you can see the device as “Bus 001 Device 022: ID 05c6:9091 Qualcomm, Inc. Intex Aqua Fish & Jolla C Diagnostic Mode” when you run the ‘lsusb’ command.
Once you have confirmed that it is connected and detected, run ‘adb devices’ and make sure it shows up like “b298c775 device” the numbers may be different for you. If all is well and you see the device listed, move on to the next step.
Run in your terminal or cmd ‘adb shell’. This will put you in a terminal instance running on the radio’s OS. It is from this terminal that our modifications will be carried out.
For fixing the screen to a more usable and pleasant size, run ‘wm size 248×200’. This will resize the native resolution to 248 by 200 pixels. I’ve tried many different combinations and this one was the best. Feel free to try any other combo of Width and Height if you want. The stock resolution is 160×128, and the command ‘wm size reset’ will revert it too.
For a longer screen timeout-time, run ‘settings put system screen_off_timeout <time in milliseconds>’. So for a 1 minute timeout (default) run ‘settings put system screen_off_timeout 60000’.
To load your own custom sound effects for Zello to use on PTT and other notifications, create a folder on your computer with the sounds. Name the folder “sounds” and make sure all files are “.wav” format.
Next (inside the adb shell) run ‘adb push <path-to-local-folder> /storage/sdcard0/Zello’ In the event that that directory is different on your radio, you may need to manually locate the Zello storage directory. To do this, (inside shell) run ‘ls’ to list the files in the root folder, and from there start looking in each directory for the Zello folder using the ‘cd <folder>’ command. You can also attempt to perform a name search but I had no success since there was not a simple search package installed on the radio. There are other ways to search but I’d found the folder already.
In order to actually select your newly loaded sounds on the Zello app, you need to be able to do touch input. But since the screen on the radio is not a touchscreen, you have to use a screen mirroring tool called scrcpy (Screen Copy). On windows there is a tool called “Total Control” but it is chinesium so use at your own risk.
To get scrcpy on your linux machine, run ‘sudo apt install scrcpy’
Then with the device plugged in, simply run ‘scrcpy’ and a small window should appear with the screen mirrored. You can scroll and click the virtual screen to manipulate the Zello app with more control. You can then easily navigate to the custom sound selection screen and pick your sounds.
Any other modifications you want to do can be done using adb. Any standard adb command will work, but keep in mind that the radio is running Android 5.1, which was the version for 2015. Some things have changed in adb since then.
A few more notes:
I’ve managed to upload EchoLink to the radio using ‘adb install <echolink apk>’ and it said it succeeded but the app does not show up on the home screen. I know that they have configured the launcher to only show the Zello and Settings app, so if that can be changed then all the installed apps would be accessable. The radio has many apps installed on it, like an audio recorder and a file browser as well as internet browser but without a computer attached, they’re useless.
RESOURCES
ANDROID APPS
- Amateur Radio Toolkit – It contains many calculators to help you design radios and antennas for all your projects.
- Ham Utility For Droidz – Detailing frequency allocations, modes, bands plans, and live space weather
- Ham Radio Call – Handy to have next to the radio to pop in a quick Call Sign and draw a line and get Miles, Azimuth, and Ham Info.
WEBSITES
- KB7TBT One Stop Space Weather Information Page – Leave it up, it Refreshes. It is really all on one page!
- Space Weather.Com – The Old Standby, I love this page!
- On-Line HF Propagation Prediction – Lots of Great Ham Radio Atmospheric and Space Weather Resourscs.
- DXrobot – Another Good Space Weather / RF Propagation Site
- Amateur Radio Repeaters By State Map – Helpful when you travel and want to talk on local repeaters. NOTE: Pins are on Towns not exact locations of Towersites.
- Amateur Radio License Map – See who’s licensed in your Neighborhood or Anywhere
- Amateur Radio Maidenhead Grid Square Locator Map – View, convert, and distance your location’s latitude and longitude to the maidenhead grid locator system for amatuer radio.
- Line of Sight Calculator will determine both the “line of sight distance” and “radio horizon / service range” of an antenna placed at a specific height above the ground.
- RF Line Of Sight Tool – This free online tool takes antenna height and the topographical formations of the earth to calculate the line-of-sight of a radio path. Note that buildings and other obstructions is not taken into consideration when calculating line-of-sight using this tool.
- GO Box Design Tool – This is a Free Rack Design Tool that lets you take a photo of your equipment and place it in place on your Rack Design. Easy to start using and there are lots of tools and templates so you can visualize your creation before you drill the first hole. See one of my Earlier Renditions of my Box that I am building now that I made in this design tool HERE.
- Cheap Zello Walkie Talkie Hacks and Modifications
CHIRP SOFTWARE AND IMAGES FOR PROGRAMMING RADIOS –
At first programming a radio seemed like a daunting task. I found chirp early on and realized that I could collect images (files for radios) and then just pluck out what I needed for my radio. It took me some time to figure it all out and even longer to find all the frequencies and codes necessary. I have saved you this frustration and time. Below are some images that you can download and use.
Remember Always read the image from the radio First and save it. Then take the file you want below and load it into your Chirp Software in a Seperate Tab. Then Copy and Paste the Channels you want to the Tab from your Radio. I wold not try to blow one of these directly into you radio. Different, makes, models and even firmware will make it not work. You can hold down ‘ctrl’ or “shift” and highlight all the channels you want and then just copy them over at one time. Pretty Easy! Don’t have Chirp, get it now, it is completely free DOWNLOAD LINK
CAUTION: You may not want to use Chirp with Yaesu Radios. It may Void Your Warranty and cause Damage. Please research before using Chirp for anything but the Imported Chineese Radios. It seems to do Fine on all of the Baofeng, TYT, QYT, B-Tech, etc.
PROGRAMMING FILES “IMAGES” THAT I HAVE MADE OR FOUND. Download, Copy Over, and Talk…
- LEE COUNTY ARES STANDARD FREQUENCY LIST – Just the List with nothing else added – Blank spaces were left in so the Channel Lineup Matches.
- LEE COUNTY ARES STANDARD FREQUENCY LIST PLUS – With Available Spaces Filled in with Useful Frequencies. Included are SARNET, NI4CE Tampa Area Repeater System, GMRS, FRS, NOAA WX, Limited Marine Channels, Local Simplex Nets, ARISS for the Space Stations Repeater and More.
- FLORIDA SAR NET
- ARISS – Amateur Radio International Space Station – On Board FM Cross Band Repeater – More Info HERE
NOTE: In Chirp you can pull down “RADIO” and Select “IMPORT FROM STOCK CONFIG” and you can drop many things right into the Chirp Image File that you downloaded from your radio. These include Marine Bande, Weather Band, Business Band, Calling Frequencies, MURS, FRS, and GMRS. You can also Select “RADIO” and then “IMPORT FROM DATA SOURCE” then “REPEATERBOOK”, then use the 2 options there to get your Local Repeaters. There are further options there to get channels imported directly into your lineup. I find the Chirp Software to be Pretty Easy to get started with. One other note. To copy and paste within Chirp Fields you must use Right Click “COPY, ect. The “ctrl” C and ‘ctrl V” do not work.